

How to Clean Portable Audio Devices: A Complete Guide
Table of Contents
- Safety Precautions Before Cleaning Portable Audio Devices
- Best Cleaning Tools for Electronics: What You Actually Need
- Step-by-Step: Cleaning the Exterior Casing and Removing Surface Dust
- How to Clean Speaker Grilles and Meshes Without Causing Damage
- How to Remove Earwax from Earbuds and Clean Audio Ports Safely
- Stylus and Needle Maintenance for Turntables and Vintage Gear
- How Often Should You Clean Audio Devices? A Maintenance Schedule
- Material-Specific Cleaning: Plastic, Metal, Fabric, and Wood
- Troubleshooting Cleaning Damage and Eco-Friendly Solutions
- Frequently Asked Questions
Last Updated: September 22, 2026
Safety Precautions Before Cleaning Portable Audio Devices
Unplug the device and remove the battery before you touch a single cloth to it. That one step prevents most of the damage people cause when they learn how to clean portable audio devices for clean portable audio. Water and live electronics do not mix, and a device that is still powered can short out the moment moisture reaches its internal parts.
Power Disconnection and Battery Removal
Turn the device off completely, then unplug every cable. If the battery comes out, take it out. A powered circuit plus any liquid equals a dead device. Static electricity is the other quiet threat. Your body can carry a charge that jumps to exposed components and fries them. Touch a metal surface before you start. Better yet, wear an anti-static wrist strap if you have one. For sealed gadgets, hold the power button for a few seconds after unplugging to drain leftover charge.
Avoiding Moisture Damage and Static Electricity
Never spray liquid directly onto a device. Spray your cloth first, then wipe. Keep water away from ports, seams, and speaker grilles. A damp cloth is fine on the outside casing, but a wet one is not. If liquid does get inside, power the device off and let it air dry for at least 24 hours before you try it again. According to safety guidance from the U.S. Consumer Product Safety Commission, mixing water and live electronics is a leading cause of household device failures and electrical hazards.
Best Cleaning Tools for Electronics: What You Actually Need
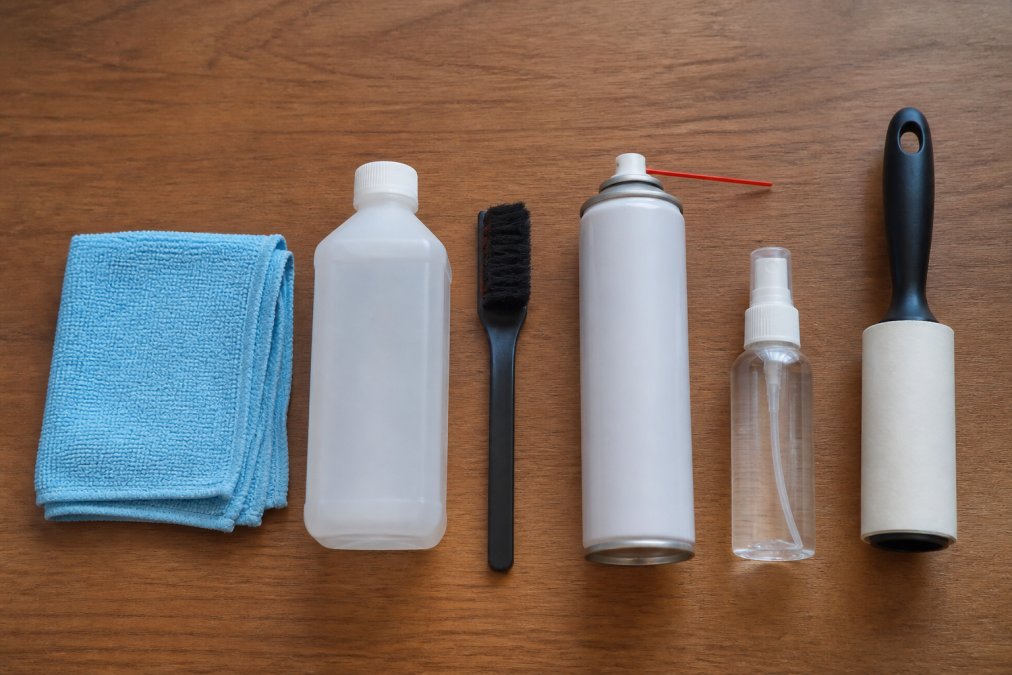
You need four core items: a microfiber cloth, isopropyl alcohol, a soft-bristled brush, and compressed air. That covers most jobs. But the tool that works on a metal speaker grille can ruin a fabric headband, so the real skill is matching the tool to the material. Skip paper towels, which shed lint into ports, and skip household glass cleaner, which leaves a residue that attracts more dust.
Here is what each tool does, and where it fails:
| Tool | Best For | Avoid On | Why |
|---|---|---|---|
| Microfiber cloth | Surface dust, smudges, screens | Nothing | Traps particles instead of pushing them |
| Isopropyl alcohol (70%+) | Disinfecting, sticky residue, metal contacts | Fabric, wood, unsealed plastic | Can strip dyes and dry out fibers |
| Soft-bristled brush | Speaker grilles, ports, stylus tips | Wet surfaces | Reaches crevices without scratching |
| Compressed air | Deep crevices, vents, keyboard-style gaps | Direct skin, delicate cones | Propellant can freeze or blast debris deeper |
| Distilled water + white vinegar (1:1) | Eco-friendly surface grime | Metal contacts, ports | Acidic residue can corrode electronics |
| Lint roller or painter's tape | Fabric-covered speakers, headbands | Mesh grilles | Lifts surface dust without pressure |
Essential Tools: Microfiber, Isopropyl Alcohol, and Soft-Bristled Brushes
A microfiber cloth is a lint-free cloth made of split synthetic fibers that trap dust through static and capillary action. Use it dry for surface dust and barely damp for stubborn marks. Wash microfiber separately from cotton, because lint from other fabrics clogs the fibers and turns your cloth into a smearing tool.
Isopropyl alcohol is the standard solvent for electronics because it evaporates fast and leaves no residue. Stick to 70% strength or higher. Lower concentrations contain more water, which lingers in seams. Do not use rubbing alcohol that contains added oils, fragrance, or glycerin, since those leave a film that attracts dust and can damage rubberized coatings.
A soft-bristled brush, like a clean makeup brush or an anti-static brush, reaches into grilles and ports. A carbon fiber brush works well for delicate stylus tips. Keep one brush for dry dust only and never dip it in liquid, because a wet brush pushes debris deeper into mesh.
Tools for Deep Cleaning: Compressed Air and Vacuum Attachments
Compressed air blasts debris out of tight spaces. Hold the can upright and use short bursts. Long blasts can push dust deeper or spray propellant onto the surface, which leaves a cold, oily residue. Keep the nozzle a few centimetres from the device and work in a ventilated area.
A vacuum attachment with a soft brush head pulls loose debris without scattering it. Use the lowest suction setting. High suction can pull at delicate speaker cones or dislodge small parts. For both tools, work in a ventilated area and keep the nozzle a few centimetres from the device.
Eco-Friendly Alternatives to Isopropyl Alcohol
If you want to avoid solvents, a 1:1 mix of distilled water and white vinegar handles most surface grime on plastic and metal casings. Apply it to a cloth, never the device. Vinegar is acidic, so wipe with a clean damp cloth afterward and dry immediately to prevent residue. For fabric-covered gear, a lint roller or a piece of painter's tape lifts dust without any liquid. Reusable microfiber cloths and a long-lasting soft brush cut waste compared to paper towels and disposable wipes. According to the EPA's guidance on safer cleaning products, choosing gentler cleaners reduces indoor air pollutants and keeps electronics safe from corrosive ingredients.
Step-by-Step: Cleaning the Exterior Casing and Removing Surface Dust
Start with the casing, because that is where surface dust collects fastest. Power the device off first. Then work from top to bottom so dust falls away instead of settling back on clean areas. This is the simplest part of the job, and it sets up everything else.
- Wipe the casing with a dry microfiber cloth using gentle sweeps.
- Dampen a corner of the cloth with isopropyl alcohol for sticky spots.
- Brush the seams with a soft-bristled brush to lift trapped dust.
- Blast the crevices with short bursts of compressed air.
- Wipe again with a clean, dry section of cloth.
For a device like the Mini Retro White Noise Bluetooth Speaker, the knobs and RGB light panel need extra care. Wipe around them, not across them, so you do not push dust into the gaps.

How to Clean Speaker Grilles and Meshes Without Causing Damage
Use a soft-bristled brush and a gentle sweep, never a wet cloth pressed hard against the mesh. Speaker grilles are thin, and pushing on them can dent the cone behind. Dry cleaning works best here. Brush in one direction to pull debris out, then follow with a short burst of compressed air.
For fabric-covered speakers, a lint roller or tape can lift surface dust without any pressure. For metal grilles, a soft brush plus compressed air handles most buildup. If debris is stuck, use a barely damp cloth and let the device dry fully before powering it on. Keeping grilles clear protects audio fidelity, since blocked mesh muffles sound.
How to Remove Earwax from Earbuds and Clean Audio Ports Safely
To remove earwax from earbuds, use a dry soft brush and a mild alcohol wipe, and never push a cotton swab into the nozzle. Earwax hardens inside the mesh and blocks sound. Soften it first with a warm, damp cloth held against the tip for a minute, then brush it away.
Ports need the same care. Here is how to handle them:
Mini Retro White Noise Bluetooth Speaker →
- Charge ports: blast with compressed air, then brush gently.
- Headphone jacks: use a wooden toothpick to lift lint, never metal.
- USB-C and Lightning ports: a soft brush plus short air bursts.
- Earbud nozzles: a dry brush, then a light alcohol wipe on the outside only.
Never use metal tools inside a port. They scratch the contacts and can cause a short. If a port looks oxidized, a small amount of contact cleaner on a swab helps, but let it dry completely before charging.
Stylus and Needle Maintenance for Turntables and Vintage Gear
A stylus needs a carbon fiber brush and a back-to-front motion, nothing more. Brush the needle gently from back to front to lift dust off the tip. Never brush side to side, which can bend the cantilever. Clean the stylus before and after every listening session.
For the record itself, a carbon fiber brush removes static and loose dust before play. A stylus cleaning solution helps with stubborn buildup, but apply it to the brush, not the needle. Replace the stylus after its rated hours, since a worn tip damages records. Oxidation on old connections is common in vintage gear. A little contact cleaner on the plugs restores a clean signal and protects sonic performance.
How Often Should You Clean Audio Devices? A Maintenance Schedule
How often should you clean audio devices? It depends on where the device sits on your body and what it touches. Earbuds need attention after every use because they sit in your ear canal and collect wax, sweat, and skin cells. Over-ear headphones need weekly attention on the ear pads. Portable speakers that live on a shelf need far less. The table below is a baseline, but the triggers underneath it matter more than the calendar.
| Device | Task | Frequency | Time Needed |
|---|---|---|---|
| Earbuds | Wipe nozzles and buds | After each use | 1 minute |
| Earbuds | Deep clean mesh and case | Weekly | 5 minutes |
| Over-ear headphones | Wipe ear pads and headband | Weekly | 3 minutes |
| Over-ear headphones | Deep clean grilles and hinges | Monthly | 10 minutes |
| Portable speaker | Wipe exterior casing | Weekly | 2 minutes |
| Portable speaker | Brush grilles and ports | Monthly | 5 minutes |
| Any device | Full deep clean and inspect | Every 3 months | 15 minutes |
Triggers That Should Override the Schedule
A calendar is a starting point, not a rule. Clean sooner when any of these happen:
- After a workout or commute: sweat and skin oils speed up buildup on earbuds and headbands. Wipe them down the same day.
- After travel: airports, trains, and pockets expose gear to dust and lint. A quick brush of ports and grilles prevents compaction.
- After eating or drinking nearby: sticky residue on casings attracts dust and can gum up buttons.
- After a beach or outdoor trip: sand and salt are abrasive and corrosive. Brush dry first, then wipe with a barely damp cloth.
- When sound changes: muffled audio, crackling, or reduced volume usually means debris or moisture. Clean before assuming the device is failing.
Material-Specific Frequency Adjustments
Fabric-covered devices, like the Bluetooth Sleep Headband from Electro Gift Shop, absorb sweat and oils, so they need more frequent surface cleaning than hard plastic. Hand-wash the fabric band gently and let it air dry, and never put the speaker module in water. Metal grilles on portable speakers show fingerprints and oxidation faster than plastic, so a dry wipe after each handling keeps them looking clean. Wood-cased gear needs the lightest touch of all: a dry cloth only, and a tiny amount of wood-safe polish if the finish looks dry.

Material-Specific Cleaning: Plastic, Metal, Fabric, and Wood
Match your method to the material, because the wrong cleaner can stain, crack, or strip a finish. Plastic takes a microfiber cloth and mild alcohol. Metal handles alcohol well but needs a dry wipe after to avoid water spots. Fabric needs dry methods only. Wood needs the lightest touch of all.
A few specifics:
- Plastic: avoid acetone and harsh solvents, which cloud the surface.
- Metal: dry immediately after wiping to prevent oxidation.
- Fabric: brush or vacuum only, never soak.
- Wood: a dry cloth, and a tiny amount of wood-safe polish if needed.
The Bluetooth Sleep Headband from Electro Gift Shop is a good example. Its fabric is sweat-wicking, so hand-wash the band gently and let it air dry. Never put the speaker module in water.
Troubleshooting Cleaning Damage and Eco-Friendly Solutions
If sound drops after cleaning, stop and check for moisture first. Most cleaning damage comes from liquid reaching internal parts or from pressure bending a component. Power the device off and let it dry for a full day before you test it again. If a grille got dented, do not try to push it back. You will likely make it worse.
Common problems and fixes:
- Muffled sound: check for leftover moisture or blocked mesh.
- No power: the battery or a port may still be wet. Let it dry.
- Crackling: debris or moisture on a connection. Clean and dry the port.
- Scratched casing: cosmetic only, but a protective coating can hide it.
For eco-friendly cleaning, skip the harsh chemicals. A mix of distilled water and a small amount of white vinegar handles most surface grime. Reusable microfiber cloths cut down on waste compared to paper towels. A soft brush lasts for years, so you buy less over time. According to the EPA's guidance on safer cleaning products, choosing gentler cleaners reduces indoor air pollutants and keeps electronics safe from corrosive ingredients.
One more thing worth knowing: cleaning and sanitizing are not the same job. Cleaning removes dust and grime. Sanitizing kills germs, which matters most for earbuds and sleep headbands that touch your skin. Use isopropyl alcohol for sanitizing, and use it sparingly on fabric.
Portable audio gear takes a beating from sweat, dust, and daily travel, and a steady cleaning habit is what keeps it sounding sharp for years. At Electro Gift Shop, we build gadgets designed to hold up to that kind of use, from the compact Mini Retro White Noise Bluetooth Speaker to the fabric-soft Bluetooth Sleep Headband. Both are portable, lightweight, and made for work, play, and travel. Shop now and keep every moment sounding better.
Frequently Asked Questions
How do I clean a portable speaker without damaging it?
First, power off the speaker and remove any cables. Use a dry microfiber cloth to wipe the exterior and a soft-bristled brush for speaker grilles. For stubborn grime, dampen a cloth with isopropyl alcohol, but never spray liquid directly on the device. Avoid abrasive cleaners and never submerge non-waterproof speakers. Let all parts dry completely before reconnecting power. This method safely cleans most portable audio devices.
Can I use rubbing alcohol to clean my phone speaker?
Yes, isopropyl alcohol (rubbing alcohol) is safe for cleaning phone speakers when used sparingly. Apply a small amount to a lint-free cloth or cotton swab, then gently wipe the speaker grille. Do not pour or spray alcohol directly into the speaker. The alcohol evaporates quickly, reducing moisture damage risk. Avoid using it on fabric or leather surfaces, as it can cause discoloration.
How do I remove dust from audio ports safely?
Start by powering off the device and removing the battery if possible. Use a soft-bristled brush or a dry, clean toothbrush to gently sweep away surface dust. For deeper debris, use a can of compressed air with short bursts, holding it upright to avoid propellant spray. Never insert metal objects like paperclips into ports, as this can damage electronic components. A vacuum attachment on low suction also works well.
How often should I clean my earbuds and headphones?
For daily users, clean earbuds and headphones weekly to prevent earwax buildup and maintain audio fidelity. If you work out or travel often, wipe them down after every use. A deeper clean, including removing ear tips and brushing speaker meshes, should be done monthly. Following a consistent maintenance schedule extends the life of your portable audio devices and keeps sound quality at its best.