

Daily Convenience vs Audio Quality: A Tactile Control Guide
Table of Contents
- Understanding Tactile Control Interfaces
- Audio Interface Features to Look For
- Physical Knobs vs Touchscreen Audio Controls
- How to Test Audio Interface Sound Quality
- Best Audio Interface for Home Recording
- The Real Trade-Off: Convenience Meets Fidelity
- Common Mistakes When Choosing Tactile Control Devices
- Frequently Asked Questions
Last Updated: October 10, 2026
Understanding Tactile Control Interfaces
Tactile control interfaces are physical knobs, faders, buttons, and switches that let you interact directly with audio equipment without touchscreens or software menus. These tactile control devices give musicians, producers, and audio enthusiasts immediate, hands-on control over sound parameters. At Electro Gift Shop, we understand that the choice between tactile control interfaces and digital alternatives shapes your entire workflow, especially when you're balancing the desire for enhanced daily convenience with the need for crystal-clear audio quality.
The real tension here isn't about which approach is "better", it's about what matters most to you in the moment. A tactile knob gives you instant feedback. You turn it, you hear the change immediately. There's no menu diving, no lag, no software crashes interrupting your creative flow. But that physical immediacy comes with trade-offs: size, portability, and sometimes audio clarity itself.
Audio Interface Features to Look For
When you're evaluating audio interfaces, three categories of features actually determine whether you'll love using it or abandon it after a month.
Signal Clarity and Noise Floor
The noise floor is the quietest sound your interface can capture without introducing unwanted hiss or distortion. A lower noise floor means you're hearing the actual audio, not the equipment's background noise. Most home recording interfaces sit somewhere between -120dB and -130dB, which is clean enough for vocals and instruments but audible if you're recording at whisper-quiet levels.
What matters in practice: if you're recording podcasts or voiceovers, you want a noise floor below -125dB. If you're recording guitar and drums, anything below -120dB works fine. The difference between -120dB and -130dB is real but won't make or break your recordings unless you're working in a silent studio with sensitive microphones.
Frequency Response and Dynamic Range
Frequency response tells you which pitches the interface can capture accurately. A flat response from 20Hz to 20kHz means the interface isn't coloring the sound, it's capturing what's actually there. Dynamic range measures how wide the gap is between the quietest and loudest sounds it can handle without distortion.
In reality, most modern interfaces have nearly identical frequency response curves. The differentiation happens in dynamic range. An interface with 110dB of dynamic range handles both a whispered vocal and a loud drum hit in the same recording without one becoming noise and the other becoming digital clipping. Interfaces with 100dB of dynamic range force you to choose: record the drums loud and lose vocal detail, or record the vocal and clip the drums.
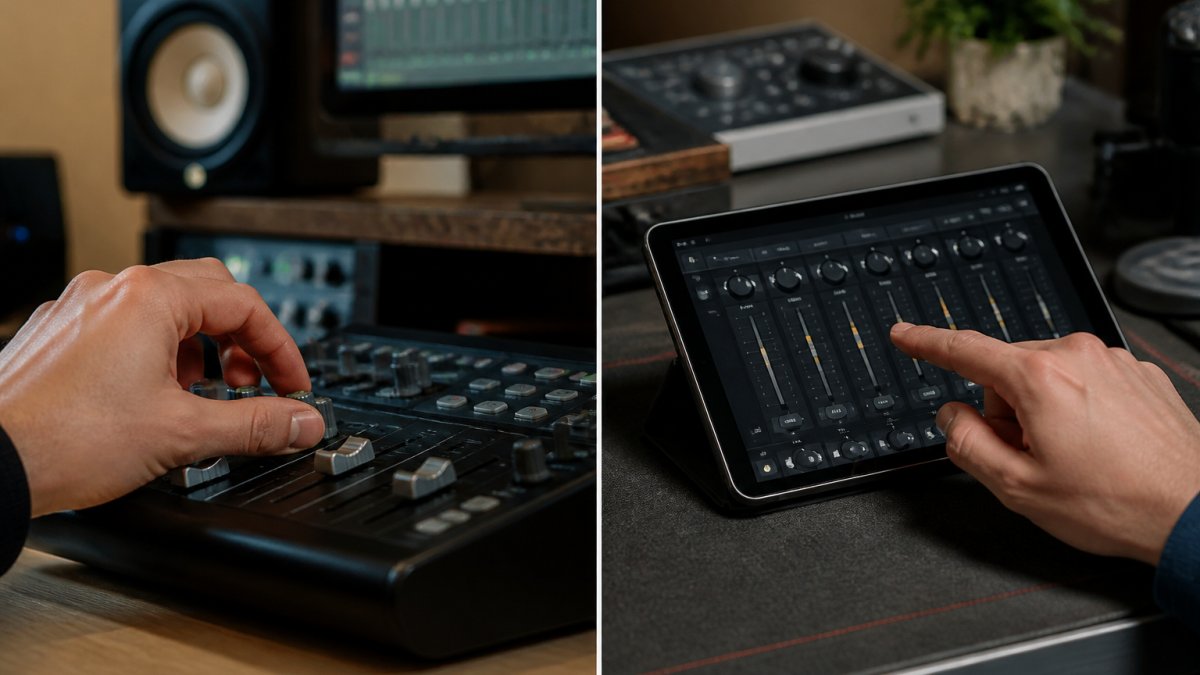
Physical Knobs vs Touchscreen Audio Controls
Here's where the enhanced daily convenience vs crystal-clear audio quality debate actually matters.
Physical knobs give you tactile feedback. You feel resistance as you turn. You know exactly where you are without looking. In a live session or a focused recording moment, that's invaluable. Your hands know the interface without thinking. The downside: knobs take up physical space, add weight, and can introduce mechanical noise if they're low-quality.
Touchscreen controls save space and weight. They're flexible, the same surface can control a hundred different parameters depending on what you're doing. But touchscreens introduce latency. You tap, the software processes, and then the change happens. In a creative flow state, that tiny delay breaks concentration. Touchscreens also require you to look at the screen, which pulls your attention away from the music.
Most professional audio interfaces use a hybrid approach: essential controls (gain, mute, monitoring levels) are physical knobs, while less-critical parameters live on a touchscreen. This balances tactile control interfaces for moment-to-moment work with the flexibility of digital menus for deeper adjustments.
How to Test Audio Interface Sound Quality
Testing an audio interface requires both subjective listening and objective measurement. Most buyers skip this step and rely on marketing claims, which is why they end up with interfaces that sound worse than expected or feel wrong to use.
Understanding Key Audio Measurements
Noise floor is the baseline hiss or hum your interface introduces when nothing is being recorded. It's measured in dB (decibels), and lower numbers are better. A noise floor of -130dB means the interface is adding almost no audible noise to your recordings. A noise floor of -110dB is noticeably worse, you'll hear a faint hiss behind quiet vocals or ambient recordings. For home recording, aim for -125dB or lower if you're recording vocals, acoustic instruments, or ASMR content. For drums and electric guitar, -120dB is acceptable.
Total harmonic distortion (THD) measures how much the interface colors or distorts the signal. A THD of 0.001% is excellent; 0.01% is acceptable; anything above 0.05% means the interface is adding audible coloration. This matters most when recording at high levels, if you're pushing a loud drum kit or electric bass through the interface, low THD keeps the tone clean.
Frequency response tells you which pitches the interface captures accurately. A flat response from 20Hz to 20kHz with a tolerance of ±3dB means the interface isn't boosting or cutting any part of the audio spectrum. A response that rises at 10kHz (a common cheap-interface problem) will make everything sound artificially bright and fatiguing over long sessions. Check the manufacturer's frequency response graph, not just the headline spec.
Dynamic range is the gap between the quietest sound the interface can capture and the loudest sound before it clips. An interface with 110dB of dynamic range can handle both a whispered vocal and a loud snare drum in the same recording without one becoming noise and the other becoming digital distortion. Interfaces with 100dB of dynamic range force you to choose: record the drums at a safe level and lose vocal detail, or record the vocal and risk clipping the drums. For mixed-source recording (vocals plus instruments), aim for 110dB or higher.
Latency is the delay between playing a note and hearing it back through the interface. Latency below 5ms is imperceptible to most people. Latency above 10ms becomes noticeable and breaks real-time monitoring, you'll hear yourself singing or playing slightly out of sync with what you're hearing. This is critical if you're recording while listening to a click track or backing track. Check the manufacturer's latency spec at your intended buffer size (usually 128 or 256 samples at 48kHz).
Listening Tests with Reference Material
Start with material you know intimately. Play a favorite album, a podcast you trust, or a song you've heard hundreds of times through the interface. Does it sound like the original, or does it sound processed (artificially brightened, compressed, or dull)? The interface should be transparent, you should not notice it at all.
Then record something simple: your voice speaking at normal volume, a single guitar note held for three seconds, a piano chord. Play it back immediately. Does it sound like what you just recorded, or does it sound processed? If the recording sounds brighter or duller than the original performance, the interface's converters or preamps are coloring the signal.
The critical mistake is testing with music you don't know. You cannot hear what's missing if you've never heard the original. A cheap interface might make a song sound "better" (more exciting, more detailed) because it's adding artificial brightness. Your ears will believe it until you compare it side by side with the original.
Measuring Against Your Recording Scenario
Not all measurements matter equally for all use cases. A podcast recorded with a USB condenser microphone cares most about noise floor and latency, you need the interface to stay silent and let you monitor yourself without delay. Audio quality specs like THD matter less because the microphone itself is the limiting factor.
A home studio recording drums, bass, and vocals cares most about dynamic range and latency. You need the interface to handle the full range from quiet vocals to loud drums without clipping, and you need zero latency in monitoring so the drummer can hear themselves clearly.
A mobile creator recording interviews or field audio cares most about noise floor and portability. You need the interface to reject background noise and fit in a backpack. Dynamic range matters less because you're recording one source at a time.
Pull the technical documentation for any interface you're considering. Look for the noise floor, THD, frequency response graph, dynamic range, and latency at your intended buffer size. If the manufacturer doesn't publish these specs, that's a red flag, they're hiding poor performance.
Best Audio Interface for Home Recording
There is no single "best" audio interface for home recording because different recording scenarios demand different priorities. A decision framework tied to your actual use case, space, and workflow is more useful than a generic recommendation.
Decision Framework by User Type and Environment
Beginner Home Studio (Bedroom or Small Apartment)
You're recording vocals, acoustic guitar, or podcasts in a space with limited desk room and background noise (fan hum, street noise, neighbors). Your priorities are: (1) noise floor below -125dB to reject background hiss, (2) compact size that fits on a small desk, (3) one or two physical knobs for gain control, (4) USB power so you don't need extra cables.
You don't need high dynamic range because you're recording one source at a time. You don't need many physical controls because you're adjusting gain once at the start of a session. You do need low latency (below 5ms) for real-time monitoring so you can hear yourself while recording. An interface with 2 inputs, 2 outputs, a single gain knob, and a headphone output is sufficient. Total cost: $100-$300.
Dedicated Home Studio (Separate Room with Space)
You're recording multiple sources simultaneously (drums, bass, vocals, guitar) and mixing in the same room. Your priorities are: (1) dynamic range of 110dB or higher to capture quiet vocals and loud drums without clipping, (2) four to eight physical knobs for real-time control during recording and mixing, (3) clean preamps (THD below 0.005%) because you're recording at professional levels, (4) low latency for monitoring while recording live instruments.
You have space, so portability is not a constraint. You can accept a larger interface because it will sit on a dedicated desk. You benefit from physical faders for mixing because you're adjusting multiple parameters during a session. An interface with 4-8 inputs, 4-8 outputs, multiple gain knobs, a small touchscreen for secondary controls, and built-in monitoring mixing is ideal. Total cost: $500-$1500.
Mobile Creator (Recording on Location)
You're recording interviews, field audio, or music in different locations. Your priorities are: (1) portability, the interface must fit in a backpack and weigh under two pounds, (2) noise floor below -125dB because you're recording in uncontrolled environments, (3) robust connectivity (USB-C with power delivery so you can charge your phone while recording), (4) minimal setup time (plug in and record within 30 seconds).
You don't need high dynamic range because you're recording one source at a time. You don't need many physical controls because you're adjusting gain once before recording. You do need a rugged design because the interface will be moved frequently. An interface with 2 inputs, 2 outputs, a single gain knob, and USB-C connectivity is sufficient. Total cost: $150-$400.
Live Performer or Streaming Creator
You're performing music or streaming content in real time. Your priorities are: (1) zero latency in monitoring (below 2ms) so you can hear yourself without delay, (2) multiple physical knobs for real-time control during performance, (3) robust connectivity (USB 3.0 or Thunderbolt for stable streaming), (4) durability because the interface will be transported and used frequently.
You need physical controls because you're adjusting parameters while performing, a touchscreen is too slow and requires looking away from your instrument. You need low latency because any delay between playing and hearing yourself breaks your performance. An interface with 4-8 inputs, 4-8 outputs, multiple gain knobs, and a dedicated monitoring mixer is essential. Total cost: $600-$2000.
Matching Controls to Your Workflow
Count how many times per session you adjust a control while actively recording or performing. If it's more than five times per session, physical knobs are non-negotiable, you need tactile feedback and no menu diving. If it's fewer than two times, a touchscreen interface with good software works fine and saves desk space.
Physical knobs excel at: gain control during recording, monitor mixing while performing, real-time EQ adjustments during mixing. Touchscreen controls excel at: parameter browsing, saving presets, adjusting settings between takes. Most professional workflows use both, essential controls are physical knobs, secondary controls are touchscreen menus.
Space and Cost Trade-Offs
A large console with 16 physical knobs and clean converters costs $2000-$5000 and weighs 20+ pounds. It gives you unmatched tactile control but requires dedicated desk space and is not portable.
A compact USB interface with 2 inputs and 1 knob costs $150-$300 and weighs under one pound. It's portable and affordable but forces you to adjust parameters through software menus.
A mid-range interface with 4-8 physical knobs, clean converters, and a small touchscreen costs $500-$1500 and weighs 3-5 pounds. It gives you 80% of the convenience and 90% of the audio quality at 40% of the cost of the premium option. Most working professionals choose this middle ground because it's the only rational choice for balancing performance, usability, and cost.
The Real Trade-Off: Convenience Meets Fidelity
Most guides pretend this trade-off doesn't exist. They'll tell you that you can have both perfect audio quality and perfect convenience. That's not how equipment works.
A large console with fifty physical knobs gives you unmatched tactile control interfaces but costs thousands, weighs fifty pounds, and takes up half your desk. A compact USB interface weighs two pounds, costs a few hundred dollars, and fits in a backpack, but you're adjusting parameters through software menus.
The honest answer: you're choosing what you're willing to sacrifice. If you choose enhanced daily convenience, you're accepting slightly longer workflows and more menu diving. If you choose crystal-clear audio quality, you're accepting larger equipment and higher cost.
Where this gets interesting is in the middle. A good mid-range interface, something with four to eight physical knobs, clean converters, and a small touchscreen for secondary controls, gives you 80% of the convenience and 90% of the audio quality at 40% of the cost of the premium option. Most working professionals choose this middle ground because it's the only rational choice.
Common Mistakes When Choosing Tactile Control Devices
Confusing "more controls" with "better controls." A console with 64 knobs isn't twice as good as one with 32. After about eight to twelve frequently-used controls, additional knobs just add clutter. You'll never touch most of them.
Prioritizing portability over audio quality. A tiny interface sounds tiny because it has tiny converters. If you're serious about recording, accept that good audio requires some physical space. Portability is nice; audio quality is non-negotiable.
Ignoring latency in monitoring. You can record through a noisy interface and fix it later. You cannot fix latency in real-time monitoring. If you're hearing a delay between playing a note and hearing it back, that interface breaks your workflow. Test this before buying.
Assuming touchscreens are "modern" and therefore better. Touchscreens are tools, not upgrades. They're useful for menu navigation and parameter browsing. They're terrible for real-time control while you're performing or recording.
Not testing with your actual microphone. An interface sounds different with different microphones. A cheap interface paired with an expensive microphone often sounds better than an expensive interface with a cheap microphone. Test the combination you'll actually use.
Choosing between enhanced daily convenience and crystal-clear audio quality for tactile control interfaces comes down to honest self-assessment. How much time do you spend recording versus mixing? How much desk space do you have? How often will you actually use physical controls versus software adjustments?
At Electro Gift Shop, we carry audio interfaces that balance these priorities with innovative design combining nostalgia and modern technology. Our curated selection delivers crystal-clear audio quality with reliable performance for work, play, or travel. Whether you prioritize the tactile feedback of physical knobs or the flexibility of compact, portable solutions, we have interfaces built for your workflow. Shop Now and find the interface that matches how you actually work.
Frequently Asked Questions
What is a tactile control interface in audio equipment?
A tactile control interface uses physical elements like knobs, faders, and buttons to adjust audio settings. Unlike touchscreen controls, tactile interfaces provide direct haptic feedback, letting you feel resistance and position without looking at a screen. This hands-on approach appeals to musicians and producers who value immediate control during recording, mixing, and live performance. Physical controls reduce latency in monitoring and allow muscle memory to develop, speeding up workflow in home recording and professional studios.
How do I know if an audio interface will deliver crystal-clear audio quality?
Check the converter specifications, particularly analog-to-digital and digital-to-analog conversion quality, noise floor measurements, and frequency response range. Listen to reference tracks you know well through the interface and compare the detail, clarity, and dynamic range against a known-good system. Look for preamps with low self-noise, high signal-to-noise ratio, and bandwidth that captures the full frequency spectrum your instruments need. Read reviews from recording professionals and test the interface yourself before committing, as audio fidelity depends partly on your room and monitoring setup.
Can a convenient daily-use audio device compromise sound quality?
Not necessarily. Modern audio interfaces blend both qualities: compact designs with high-fidelity converters, simplified workflows with crystal-clear signal processing, and tactile controls that are both intuitive and sonically transparent. The key is prioritizing quality components in critical areas (converters, preamps) while streamlining non-essential features. Many musicians find that a well-designed interface actually enhances daily convenience because superior audio quality means fewer takes, faster editing, and more confident mixing decisions.
Should I choose physical knobs over touchscreen controls for audio work?
Physical knobs offer tactile feedback, faster access without menus, and no latency from screen response. They're ideal for real-time adjustments during recording and mixing. Touchscreens save space and reduce cost but require visual attention and introduce slight delays. The best choice depends on your workflow: home recording and live performance favor physical controls, while portable or space-limited setups may benefit from touchscreen interfaces. Many professionals use both, combining a compact touchscreen device with external physical controllers for critical tasks.